Tired of sky-high prices for plant-based milk and questioning the long list of ingredients on store-bought cartons? Imagine a world where your soy milk is not only fresher and creamier but also significantly cheaper, made right in your own kitchen. It might sound like a daunting task, but mastering a simple homemade soy milk recipe is surprisingly achievable and immensely rewarding. This guide will walk you through every step, transforming humble soybeans into a luxurious, additive-free beverage that will elevate your morning coffee, smoothies, and cooking.
For many, the journey to homemade soy milk begins with a desire for purity and control. Unlike many commercial varieties packed with sweeteners, gums, and stabilizers, your homemade version offers unadulterated goodness. And while it does require a bit of hands-on effort – some might even call it a meditative process – the satisfaction of sipping a glass of freshly made soy milk, knowing exactly what went into it, is unparalleled. Think of it as a small investment of time for a giant leap in flavor, quality, and savings.
Why Go Homemade? The Unbeatable Benefits of DIY Soy Milk
The allure of making your own soy milk extends far beyond just the novelty. It’s a practical, economical, and delicious choice that offers a multitude of advantages over its store-bought counterparts:
- Unmatched Freshness and Flavor: Store-bought soy milk, even the unsweetened kind, often has a distinct, sometimes "beany" flavor that can be off-putting. Homemade soy milk, when made correctly, boasts a clean, slightly sweet, and incredibly fresh taste that's a world apart. You'll truly appreciate its subtle nuances in everything from cereal to lattes.
- Significant Cost Savings: Soybeans are incredibly affordable, especially when purchased in bulk. For the price of a single carton of premium soy milk from the store, you can often buy enough dried soybeans to make several liters of your own. Over time, these savings add up substantially, making it a smart choice for budget-conscious households.
- Complete Ingredient Control: This is perhaps one of the biggest draws. When you make soy milk at home, you dictate what goes in (just soybeans and water!) and, more importantly, what stays out. No added sugars, artificial flavors, preservatives, or emulsifiers. If you desire a touch of sweetness, vanilla, or almond extract, you can add them to your exact preference, unlike the often overly sweetened or bland store-bought versions.
- Versatility and Zero-Waste Potential: Beyond a delightful drink, homemade soy milk is a foundational ingredient in vegan kitchens. It's perfect for baking, cooking, making creamy sauces, and, notably, as the base for homemade tofu. Even the leftover soy pulp, known as "okara," is a treasure! It's highly nutritious and can be transformed into delicious vegan patties, baked goods, or even added to soups, ensuring nothing goes to waste. This commitment to sustainability is a huge bonus.
- Healthier Choice: With control over ingredients, you're choosing a healthier, purer option. You avoid potential allergens or sensitivities to additives found in commercial products.
If you're still on the fence about whether to embark on this culinary adventure, consider the compelling reasons outlined in our detailed article: Why Make Soy Milk at Home? Cheaper, Tastier, and Healthier.
What You'll Need: Essential Tools & Ingredients for Your Soy Milk Journey
Gathering your supplies is the first step towards fresh, creamy soy milk. The good news is, you likely already own most of what you need!
Ingredients:
- Dried Soybeans: The star of the show! Look for high-quality, non-GMO, organic soybeans if possible. A good starting point is about 1 cup (200-250 grams) of dried soybeans, which yields a generous amount of milk. You can easily adjust the quantity based on your needs; a pound of soybeans can produce enough for milk, tofu, and okara recipes!
- Water: Filtered water is recommended for the best flavor, both for soaking and blending.
- Optional Flavorings: Vanilla extract, almond extract, a pinch of salt, maple syrup, honey, or your preferred sweetener.
Equipment:
- Large Bowl: For soaking the soybeans.
- High-Powered Blender: Essential for thoroughly grinding the soaked beans into a fine slurry.
- Nut Milk Bag or Fine Mesh Cheesecloth: This is crucial for straining the milk from the pulp. A dedicated nut milk bag is often easier to use and more durable for squeezing.
- Large Pot (preferably non-stick): For cooking the soy milk. Choose one with high sides to prevent boil-overs.
- Large Bowl for Straining: Place your nut milk bag over this.
- Large Spoon or Ladle: For skimming foam and stirring.
- Airtight Bottles or Jars: For storing your finished soy milk in the refrigerator.
The Simple Homemade Soy Milk Recipe: Step-by-Step Guide to Freshness
Ready to transform those dried beans? Here’s your comprehensive, simple homemade soy milk recipe:
Step 1: The All-Important Soak
Measure out your dried soybeans. For every cup of soybeans, you'll want to use about 3-4 cups of water. Place the soybeans in a large bowl, cover them with plenty of cold water (they will expand significantly), and let them soak overnight, or for at least 8-12 hours. This step is vital as it softens the beans, making them easier to blend, and helps improve the digestibility and flavor of the finished milk. After soaking, drain the water and rinse the beans thoroughly under cold running water. This initial rinse helps reduce any "beany" flavor.
Step 2: Blend & Strain for Creamy Goodness
This is where the magic begins.
- Blend in Batches: Transfer a portion of your soaked and rinsed soybeans to your high-powered blender. Do not overcrowd it! For about 1 cup of soaked beans, add 3-4 cups of fresh, filtered water. Blend on high for 2-3 minutes until the mixture is completely smooth and creamy, resembling a very fine slurry. The smoother the blend, the more milk you'll extract.
- Prepare for Straining: Place your nut milk bag or a double layer of fine-mesh cheesecloth over a large, clean bowl.
- Strain the Milk: Carefully pour the blended soy mixture (the "slurry" or "batter") into the nut milk bag. Gather the top of the bag and begin to squeeze firmly and steadily. Work your way around, pressing out all the liquid. This requires a bit of "elbow grease" but is crucial for maximizing your yield of creamy soy milk. Continue squeezing until no more liquid drips out.
- Separate the Okara: The fibrous pulp left inside the bag is called okara. Transfer it to a separate bowl. Do not discard it! As mentioned, okara is incredibly versatile and can be used in numerous recipes, reducing food waste and adding nutritional value to other dishes.
- Repeat: Continue blending and straining the remaining soaked soybeans until all of them have been processed.
Step 3: Cook to Perfection and Enjoy
Cooking your freshly strained soy milk is essential for both safety and flavor. Raw soy milk contains enzymes that can inhibit digestion, so boiling it is a non-negotiable step.
- Transfer to a Pot: Pour your strained soy milk into a large, heavy-bottomed pot.
- Skim the Foam: As the milk begins to heat, a layer of foam will form on the surface. Use a large spoon or ladle to gently skim this foam off. This isn't strictly necessary but results in a cleaner, smoother final product.
- Bring to a Simmer: Cook the soy milk over medium heat, stirring occasionally to prevent it from sticking to the bottom. Once it begins to simmer (you'll see small bubbles forming around the edges), reduce the heat to low and continue to cook for at least 15-20 minutes. Crucially, watch it carefully! Soy milk has a notorious tendency to boil over very quickly, creating a sticky mess. A heavy pot and diligent stirring will help prevent this.
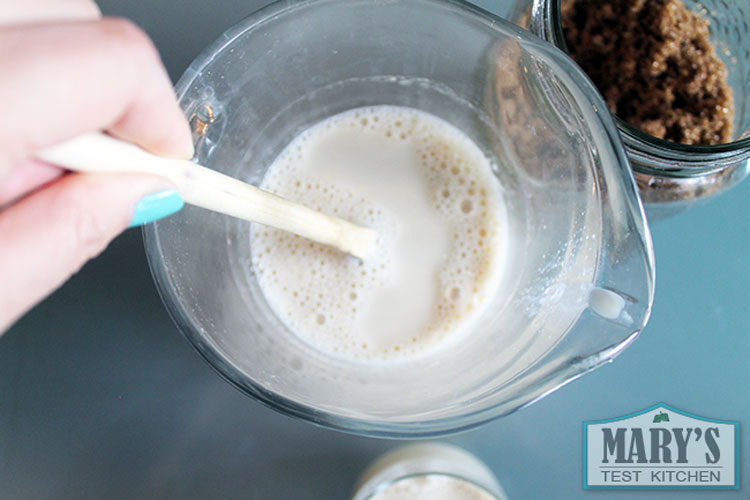
- Add Flavorings (Optional): If you want to sweeten or flavor your soy milk, add your desired ingredients (e.g., a pinch of salt, vanilla extract, honey, maple syrup) during the last 5 minutes of cooking. Stir well to combine.
- Cool and Store: Once cooked, remove the pot from the heat. Allow the soy milk to cool completely within the covered pot before transferring it to clean, airtight glass bottles or jars. Refrigerate immediately. Homemade soy milk will keep fresh for up to 5-7 days in the refrigerator.
Tips for the Best Homemade Soy Milk Experience
To ensure your homemade soy milk is consistently delicious, keep these expert tips in mind:
- Adjusting Consistency: If your soy milk seems too thick, you can thin it out by adding a bit more water during the blending stage or after cooking. For a richer, creamier milk, use slightly less water.
- Preventing Boil-Overs: Never walk away from simmering soy milk. Keep the heat medium-low, use a large pot (giving the milk plenty of head-room), and stir frequently. A non-stick pot can also help prevent sticking and scorching.
- Enhancing Flavor: Experiment with natural sweeteners like dates, agave, or stevia. A touch of cinnamon, cardamom, or even cocoa powder can transform your basic soy milk into a gourmet treat.
- The Power of Okara: Don't underestimate your leftover soy pulp! It’s a fantastic source of fiber and protein. Use it to make savory veggie burgers, add to muffins, bread, or even fortify meatballs. There are countless zero-waste recipes available online.
- Tofu Making: With your fresh soy milk, you're perfectly positioned to try making your own fresh tofu! The cleaner, purer taste of homemade soy milk translates directly into superior homemade tofu.
- Cleaning Up: Rinse your blender, nut milk bag, and pot immediately after use. This prevents soy residue from drying and becoming difficult to clean.
Embracing the process of making your own soy milk might seem like an extra step in a busy world, but the payoff is immense. You gain control over ingredients, save money, and get to enjoy a truly fresh, delicious, and versatile plant-based milk. It’s a testament to how simple, natural ingredients can be transformed into something extraordinary with a little care and effort.
So, take the leap! Invest a small amount of time, a bit of "elbow grease," and you'll be rewarded with a batch of exquisite, homemade soy milk that will make you wonder why you ever bought it from the store. This simple homemade soy milk recipe is not just about making milk; it's about making a healthier, more sustainable, and undeniably tastier choice for yourself and your family. Enjoy the process, and savor the delicious results!
